Friday, November 11, 2011

Churn Dash

This is an easy block that looks hard.  Remember to press as you go and plan ahead which way you will press the seams so they alternate.  Have fun.  And.... send us some photos of your creations!


A - Cut 1 - 1 1/2” x 12’ background fabric
B - Cut 1 - 1 1/2” x 12” 
C - Cut 1 - 2 1/2” x 2 1/2”
D - Cut 2 - 2 7/8” x 2 7/8”
E - Cut 2 - 2 7/8” x 2 7/8” background fabric


Pair Strip A and Stirp B right sides together.
Sew along the longest edge.
Press seam towards darkest fabric (B).
Line up sides on mat and cut end so square.


Cut AB strip into 2 1/2” x 2 1/2” pieces.


Take the two “E” squares.
Place them wrong side up on cutting mat.
Draw 1 line diagonally from corner to corner.
The cutting board helps to hold the fabric still.

Pair D and E right sides together.  (2 sets)
Stitch 1/4” on either side of the pencil line.


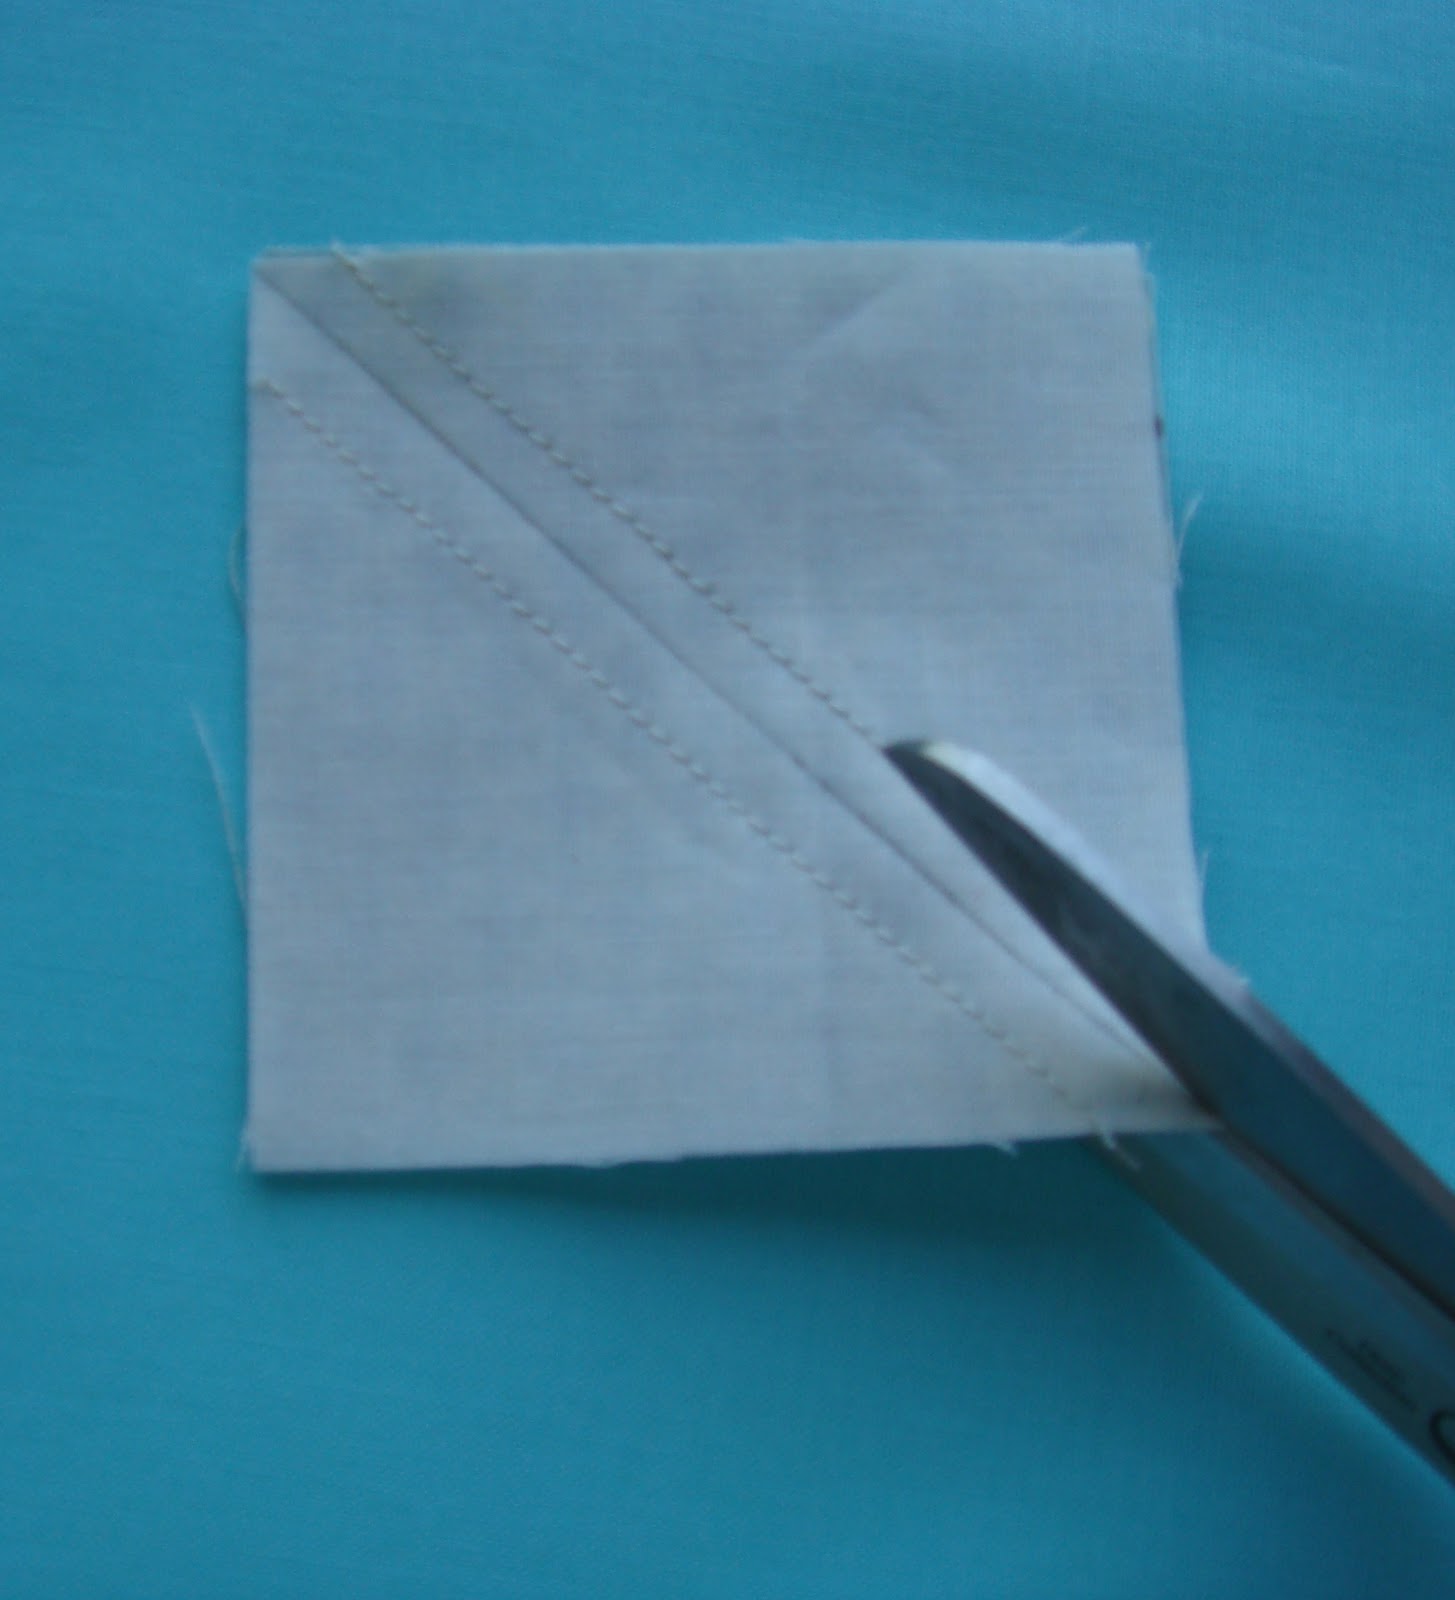
Cut on the pencil line.


Open and press to darker fabric.
Clip “dog ears.”
You now have 4 triangle squares.


Lay out all pieces to form the block.
Stitch into 3 strips and press as shown.
 Seam direction should alternate.
The pieces lock to form perfect intersec.tions.  


Stitch strips together.


Press.  


 Done!
Your finished block should measure 6 1/2 inches square.


Friday, October 14, 2011

nine patch

9 PATCH  is our second block. It consists of 2 blocks that you can see if you scroll to the bottom of this entry. I chose to use many fabrics to make my block. It will look striking in alternating 2 fabrics or alternating high contrast light and dark. I hope Lisa will post hers and Marci (hint hint!)  so you can see some variations. Also, a monochromatic look would be nice. PLEASE post some photos on Flicker. You can also leave a question in the comments and I will be happy to answer and help out.  Happy piecing!


Cut 18  1 1/2”x 6” pieces


Sew together in sets of 3


You will end up with at least 6 strip sets
Press 3 sets with seams in
Press 3 sets with seams out


Cut crosswise 1 1/2”


You will end up with 18 pieced sets


Arrange into 5 groups of 3 as desired
(There are more pieced sets than needed)
TAKE A PHOTO NOW FOR REFERENCE


Seams should be pressed to alternate.  This helps to match seams nicely when stitching.


Press each seam as you go
Stitch 9 patches together


9Patch (a) has 3 blocks
9Patch (b) has 2 blocks

Thursday, September 22, 2011

Roman Stripe!

I have finally found the official name of our first block.  The Encyclopedia of Pieced Quilt Patterns that I have used as a source for many of the blocks in the sampler did not have a name for 4 stripes of fabric in each quadrant of the block; they only showed 3. I thought that 4 looked better, so Roman 3 Square became Roman 4 Square.
Yesterday I was looking at some old quilting books and found our block. It is called the Roman Stripe. Maybe now we can find the history of it. Isn't this a lovely variation? You can see more quilts from the Gee's Bend collection here.


Friday, September 9, 2011

Roman four square

Here is the first block of our quilt.  I think the photos will help you get off to a good start.  Leave a comment if you have any questions.  We would love photos of your fabric choices and completed blocks as you go.  Happy piecing!

Choose your fabric


Cut 16    5” x 1 5/8” strips  of various colors, the length of the strips parallel to the selvage 


 You need 16 strips total


Arrange the stips 
Snap a picture so you can refer back to it as you sew


With 1/4” foot, sew your stips, right sides together!


Press, dry iron, on top, away from the light strips if possible


Sew and press the 4 sections


Sew right 2 sections together
Sew left 2 sections together 
Press as you go


 Line up the middle seams


Pin on either side of seam
Line up ends and sew!!!!


 The completed block

Monday, August 15, 2011

THE PLAN

Here are the names of the blocks and the order we are going to make them.

The first block is the Roman Four Square. I will post how to make it Saturday, September 10.

The whole sampler will require 6-10 fat quarters of main fabric and 1 1/2 yards background fabric.

As soon as you have your fabric purchased take a picture of it and add it to our flickr group so we can all see what you have selected!

The finished size of the sampler will be 24 inches wide by 27 inches long.

Friday, August 12, 2011

HERE WE GO


We talked in the meeting about changing the big star to one Jane had found. We put the block in there to see how it looked and did not like it. So, we keep it as is unless someone wants to suggest a different one.

The finished size of the sampler is 24 inches wide by 27 inches long.
You can add borders to make this as big or as little as you want.
to make a 60 inch lap quilt, you will add 18 inch borders.


BASIC QUILTING TOOLS


sewing machine-clean, oil and be sure it is stitching great
presser foot and cord-easy to forget these when taking machine to class
quarter inch presser foot-a great investment for consistent piecing
tweezers-to pull threads when machine jams
screw driver-for machine repair
post-it notes-to use as 1/4" guide on base of machine if needed
sewing machine manual-keep w/machine always (most manuals are on the internet)


thread- 100% cotton, I like Gutterman(long staple fibers) same color or darker than fabric
bobbins-make at least 3 before starting a project-invest in lots of extra bobbins


rotary cutter-a larger one doesn't dull as quickly-have extra blades on hand; store up high
scissors-(large and small with a pointy tip-use only for fabric
seam ripper-I like Clover


marking pencils-(light and dark) sliver of soap works too
pencil sharpener-with lg. and small openings
blue marking pen-disappears w/ water (white pen is fine tip, blue is larger)


pins-flat flower head are great, glass head clover are good also
extra sewing machine needles (size 14)
pin cushion-magnetic are very handy--do not put on or in front of computer machines


cutting mat-24"x 36" is ideal ***keep out of sun and heat and store flat***
rulers-5" x 24" w/ a lip; 6" x 12"


cutting mat ironing board combo-the combo cutting mat and ironing board that folds is handy
not necessary, just fyi


iron-all pieces get pressed as you sew


tissue paper-handy to pin block pieces on if have to store before finishing block


template plastic-for applique


fabric- 1 1/2 - 2 yards background; 6-10 fat quarters (you can start with just 3)
100% cotton broadcloth


GOOD print choices for the beginner:

All-Over Prints:
  • which ever way it is turned, it looks right side up
  • when 2 LIKE pieces are sewn next to each other, the block's appearance isn't distorted


POOR print choices for the beginner:
  • stripes, plaids, checks, directional prints

Next month: We will be cutting out and sewing our first block. We will learn strip piecing.